No one has perfect brows naturally, well maybe you do:)
In my opinion, it’s not about having sterile stenciled perfection in brows, but more about achieving balance and proportion for our unique faces.

Nearly, every day I get compliments on my brows. People are just so nice!
Truth is, my brows get a lot of help to look full and natural. One main process I have done to maintain easy brows is Microblading.

Microblading BROWS is ART!
Look at a portfolio of work prior to booking your treatment.
Make sure you like clients before and after results.
I just completed my fourth time having my brows microbladed. After many experiences, I can offer a lot of insight on receiving this procedure. I’ve NEVER DIY’d my own brows. I know people do, I’m just very upfront that this is not something I’ve ever felt inspired or capable of doing. Again it takes an artist’s eye to really adjust brows correctly in width and height. Minute aspects can be difficult to see on yourself, however, DIY microbladed brows is possible and you can purchase all the expert supplies from The Micropigmentation Center if you feel inclined. Save 10% code: KAOS10
Watch me get my brows Microbladed
Having your brows Microbladed is a form of an aesthetic tattoo. The ink is not placed quite as deep as a body tattoo so it’s not considered permanent. This is good in the event you are unhappy with your brows or when eventually brow styles change.

HOW IS MICROBLADING PERFORMED?
The provider has a very sharp blade that cuts very fine feather line cuts in your brows. Or where you would like to have brows. Then the brow is coated with a permanent makeup ink. The ink sits into these cuts and voila you have brows that are crisp, fuller, and darker.
HOW LONG DOES MICROBLADING LAST?
Initially, they will be more intense, just like getting your hair colored. Then the top layers of ink will fade and as the cuts heal the submerged ink will be locked in, providing you with effortless brows for 12-18 months.
NOT ONE & DONE
After your initial session. Your “brow artist” will have you return in 4-6 weeks to do a check-up and address any additions to help complete your desired look.
COLOR FADING
The color will fade over time and if you’re into skincare acids you will expedite the color loss. This is why when I do TCA peels or any other intense acid peel I block out my brows with vaseline to ensure the TCA acid does not peel the color from my brows. Many aspects in life will fade your brows, including the sun, Retin A, lactic & glycolic toners, face washes that include acids, and acid peel pads.
With this in mind, I try to be careful around my brows when I do skincare. For example, at night I will not let Retin A touch my brows, and in the morning I will avoid Vitamin C touching them as well.
Additionally, I make sure that my brows are protected with daily SPF. If you live on well water like me, the minerals can fade or pull your color in directions that are less than desirable. All things to keep in mind as you set expectations for the longevity of your brows.
WHAT IF YOU ARE UNHAPPY?
If you are unhappy with your brows you could use TCA acid to help exfoliate that skin and remove the pigment which is set in the skin. If you had them done professionally make sure to contact your “brow artist” prior to this action. First, they may be able to address the undesirable aspect you perceive. Second, if they are newly bladed and in your bathroom mirror you notice something off, contact who did them. With a salt solution, they can quickly lift the pigment and help solve your issue.
MORE TIPS BEFORE YOU GO
- Prior to Procedure avoid sun, blood thinning medication, alcohol, an abundance of caffeine, (more sensitive during your menstrual cycle).
- Wash your hair because you will not be able to for a few days after treatment.
- If you’re a “Gym Rat” or “Hot Yoga” enthusiasts you will take the next few days off following your treatment to avoid extra sweat and heat.
- Be mindful of your social calendar as your brows will be more intense than you might like, this will subside in a few days or up to a week.

IS IT WORTH IT?
Absolutely! I think beautifully sculpted brows make a huge impact on your face, on your perceived youth, and really help define an individual’s look. Plus if you’ve been a slave to your brow pencil then you will save yourself time.

NATURAL KAOS APP
My YouTube channel now has its own Private APP: NATURAL KAOS
It’s filled with topics, protocols, where to find products, and most importantly so many members all sharing their experiences doing Tox, Filler, Threads, Acid Peels, Fat Dissolver and More.
AVAILABLE ON:

WHAT’S THE PROCESS?
After deciding on your “brow artist” and booking your appointment; or in the event you decide to do this DIY (which again I really don’t think is a wise choice, at least not for your first round); this is the process for Microblading your Brows.
- Your brows might get trimmed down depending on their length so the artist can see where your hair is growing from.
- By this time you should have determined what type of brow look you want. Your artist should have assessed your current brows, along with your goal brows, and should be able to give you advice on what is best for your face.

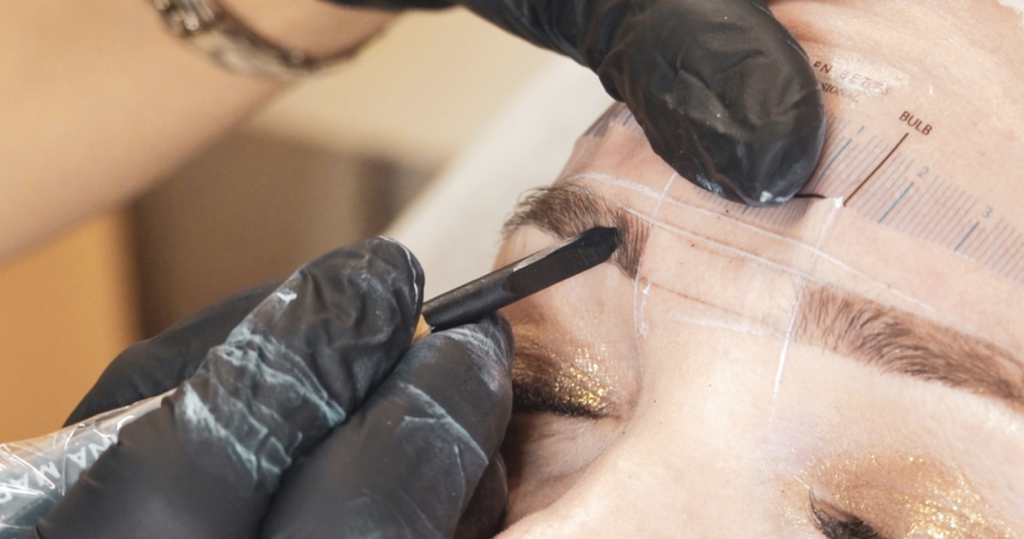
- Next are the measuring tools. Brow artists use clear flexy rulers and mapping thread to make sure everything comes out symmetrical and balanced. The mapping threads are coated in order to leave marks that your artist can follow.
- Then they will sketch with a pen or marker how they plan to blade your brows. You will look at this example and determine if you are happy or want to tweak them.
- Your artist should sample ink colors on your forehead and help you decide on the right tone for you. I like a dark walnut for my brows. Save 10% code: KAOS10
- Once the brow shape and design are agreed upon, your artist will coat your brows in topical numbing cream.

- Once the numbing cream has taken the edge off, it will be removed, wiped with alcohol and your artist will start making cuts with her blade. This can be painful. I have a hard time getting numb, so your experience might be different from mine.

- As the cuts are made, your artist dips her blade into the ink, helping deposit the color into your skin. Once the blade strokes are complete. The color is then masked over your brows for about 20 minutes.

- The ink is then removed and your artist will clean you up. They should add some topical healing cream on top of your brows prior to your departure.

- You will be sent home with a kit that should include aftercare instructions, healing ointment, and anything else your brow artist provides their clients.
- You will return for a follow-up appointment about 4 weeks later to do any touch up’s.

PREPPING TIPS FOR YOUR MICROBLADING APPOINTMENT
- Do not do any tanning a week prior.
- Stop drinking caffeine and alcohol a couple of days prior.
- Get your last work out in for the next few days.
- Wash your hair.

Remember your brows will be intense immediately following your treatment but they will fade a bit with time as you begin to wash your face, take a shower, and go back to regular life.
If you are interested in going to Michelle or getting trained and certified to do this for others you can find her on Instagram @creative_touch_beauty as well as on her website


Make sure to watch my whole experience on YouTube so you can get even more insight into this procedure.
Thank you for reading and watching my microblade brow experience.
I hope you have a wonderful day.
Kim xoxo

